Middle Eastern Dance
Other Hip Movements
This page lists descriptions of the Hip Circle and several of its variations.
Hip Slide
Place your feet about hip width apart and keep them parallel to each other.
The knees should be soft and to start the weight should be distributed evenly
to both feet. Now keeping the torso still and without changing height, slide
your hips out to one side and then back to center and then out to the other
side. Do not twist the hips and try to keep the hips parallel to the floor at all
times. Bend and straighten your legs as needed to pick up slack in the
movement so you can avoid lifting and dropping the hip. It is important to
keep the movement even on the same horizontal plane.
Hip Sway 1
This move is done by placing your feet about hip width apart and keep them
parallel to each other. To start the weight should be distributed evenly to
both feet. Now keeping the torso still and without changing height, slide
your hips out to one side and lift on that side then drop it back into center
and out to the other side and lift the hip on that side. This should cause your hips to form a "u" shape.
Hip Sway with a Soft Kick
This move is done by placing your feet about hip width apart and keeping them parallel to each other. To start the
weight should be distributed evenly to both feet. Now keeping the torso still and without changing height, slide your
hips out to the right and lift the right hip by contracting the right obliques while softly kicking the left leg (or "releasing"
the left foot) out in front of you then bring your hips back to center and out to the left side and lift the left hip by
contracting the obliques while softly kicking the right leg out (or "releasing" the right foot) in front of you. This should
cause your hips to form a "u" shape.
Lift and Drop with a Straight Leg
To start point one foot and keep that leg straight, touch just the toes to the floor. The other leg should be straight but
never locked. Lift your hip up pushing with the free foot and then drop that hip down kicking the pointed foot out just
a little. Then step onto the free foot and repeat on the other side.
Tuck
Keep the feet about hip width apart and parallel to each other. Make sure to
keep the kees soft or slightly bent. Contract the lower abdominal and the
buttocks this will cause the pelvis to tip forward. This can be done quickly
for a sharp accent or softly for a more gentle accent.
Release
This is the opposite of the tuck. Keep the feet about hip width apart and
parallel to each other. Make sure to keep the kees soft or slightly bent. Tilt
the pelvis back. It might feel similar to sticking your butt out. There is
however a distinct difference between sliding or pushing your hips back and
doing a pelvic release. Some people think of this as a drop; if you are
focusing on what thr front of your pelvis is doing it can feel as though the
front is being dropped.
Pelvic Scoop
Standing in the basic position tilt or release the pelvis back causing your
butt to push back. Then bend the knees a little more as you start to bring
the pelvis back to a relaxed center position, next straighten your legs a little
as you tuck or tilt the pelvis forward and then pull it back to center.
Imagine scooping something up with your pelvis. This movement can be
thought of as the lower half of an undulation. You can make the movement
look more fluid by engagin the abdominal muscles as well. When tucking
the pelvis contract the upper abdominals and roll down as in a stomach
roll as you pull the hips back so that the roll ends with a pelvic release. To
add more flair and complexity try layering on a shimmy!
Pelvic Roll
Standing in the basic position with the knees bent, tilt or tuck the pelvis
forward. Then push your pelvis forward in a rolling motion by
straightening the knees a little and then bending them again. Then pull
the hips back but keep the pelvis tucked slightly under you, do not allow it
to release back. It will be like doing half of a body wave or reverse
undulation. It feels similar to riding a horse or camel at a slow speed. Try
to keep the movement as fluid and smooth as possible. You can make the
movement look more fluid by engaging the abdominal muscles in an
abdominal roll to acentuate the rolling movement of the hips as a
continuation from the upper body. Try layering on a shimmy for an even
more interesting and complex move.
Forward Crescent
Standing in basic position with feet spead just a little wider then hip width
apart. Move your hips in a forward arc to the right. Now bring them back
around, out in front and around and out to the left. Think of making half of a hip circle in front of you.
Backward Crescent
Standing in basic position with feet spead just a little wider then hip width apart. Move your hips in a backward arc to
the right. Now bring them back around, out in back and around and out to the left. Think of making half of a hip circle
behind you.
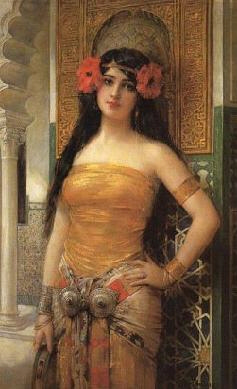
Poppies or Les Coquelicots
by Leon Comerre
Head Movements
|
Arm Movements
|
Torso Movements
|
Stomach Moves
|
Hip Movements
|
Other Movements
|
Floor Work
|
Veil Work
|
Props